
Caspersmile's At-Home Straightening Guide
Note
If your impressions aren’t usable, you’ll need to purchase additional putty for £25, which will delay the start of your treatment.
Jump to section
Ensure you have these essentials before beginning

Trays
Ensure a comfortable fit of the trays before using the impression material.

Timer
Have a timer on hand to monitor your impression process.

Cheek Retractor
Included in the kit to help you stretch your mouth and insert the trays.

Putty
Gather the base and catalyst components. Mix them only when you're ready to start.
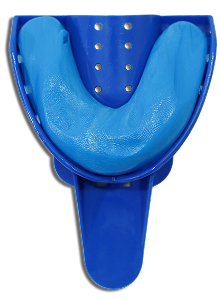
Tray fit check
Place your teeth in the center of the tray.
Your teeth should not touch the tray walls.
The tray should fully cover from molar to molar.


Note
If your tray doesn’t fit properly, contact us at +44 20 4634 2811 to request a replacement.
Prepare to impress
Prior to taking your impressions, put all the impression putty in the refrigerator for 15 minutes. Then take it out and let it cool down to room temperature. Once done, ensure a clean and smooth process by adhering to these steps.

01 Sanitize your hands
Begin by thoroughly washing and sanitizing your hands.

02 Clean your teeth
Brush and floss to remove any particles from your teeth.

03 Fit test
Ensure the trays fit in your mouth before adding the putty material.
Start taking your impressions
Start with the upper jaw impression. Focus on one tray at a time.
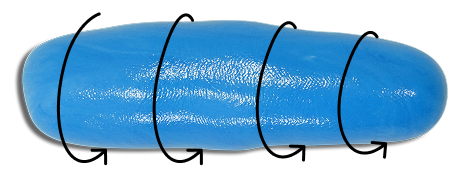
Step 1. Mix and mold the material
Your kit includes white and colored putty. Wear gloves and mix them into a single, uniform color.


Within 30 secs.

Within 5 secs.

Within 5-10 secs.

Step 2. First impression
Note: Do not remove the putty from the tray.

4 mins 30 sec
Step 3. Get a thumbs-up before you move on

If your impressions don’t turn out right:
You can reuse the trays. Rinse them with warm water, clean gently using mild soap and a toothbrush, and dry thoroughly before reuse.
Step 4. Repeat for lower teeth
Now, make impressions of your lower teeth, repeating the process twice for both upper and lower arches. Send all four impressions for evaluation.
Within 30 secs.
Within 5 secs.
Within 5-10 secs.
 Hold 3 mins
Place the tray in your mouth and keep it still. Pull it upwards to remove.
Step 5. Photograph your teeth
Insert the cheek retractor and take close-up photos of your mouth and gums. Ensure good lighting or use your phone's flash. Upload these photos to the Caspersmile Tracker App.

Front teeth photo: Close your jaw and take a photo of your teeth from the front. Bite down as you naturally do.

Right side Photo: Close your jaw and take a picture from the right side of your mouth.

Left side photo: Close your jaw and take a picture from the left side of your mouth.

Lower Teeth Photo: With your mouth wide open, take a picture of your lower molars.

Upper teeth photo: With your mouth wide open, take a picture of your upper molars.
Step 6. Send your impressions

Congratulations on completing your impressions!
Place all the impressions in a box or envelope. Use the provided pre-paid return label and ship them back to us.
Pro tips to create precise dental impressions

- Keep your lips over the tray to ensure the putty reaches your gums without any obstruction.
- Use your thumbs to put gentle pressure on the upper impression and your fingers on the lower impression.
- Ensure each impression material is used only once to get a clear imprint.
- Refrain from reusing material for better impressions.
- Pull out the trays in one swift motion to avoid drag marks.
How to spot bad dental impressions
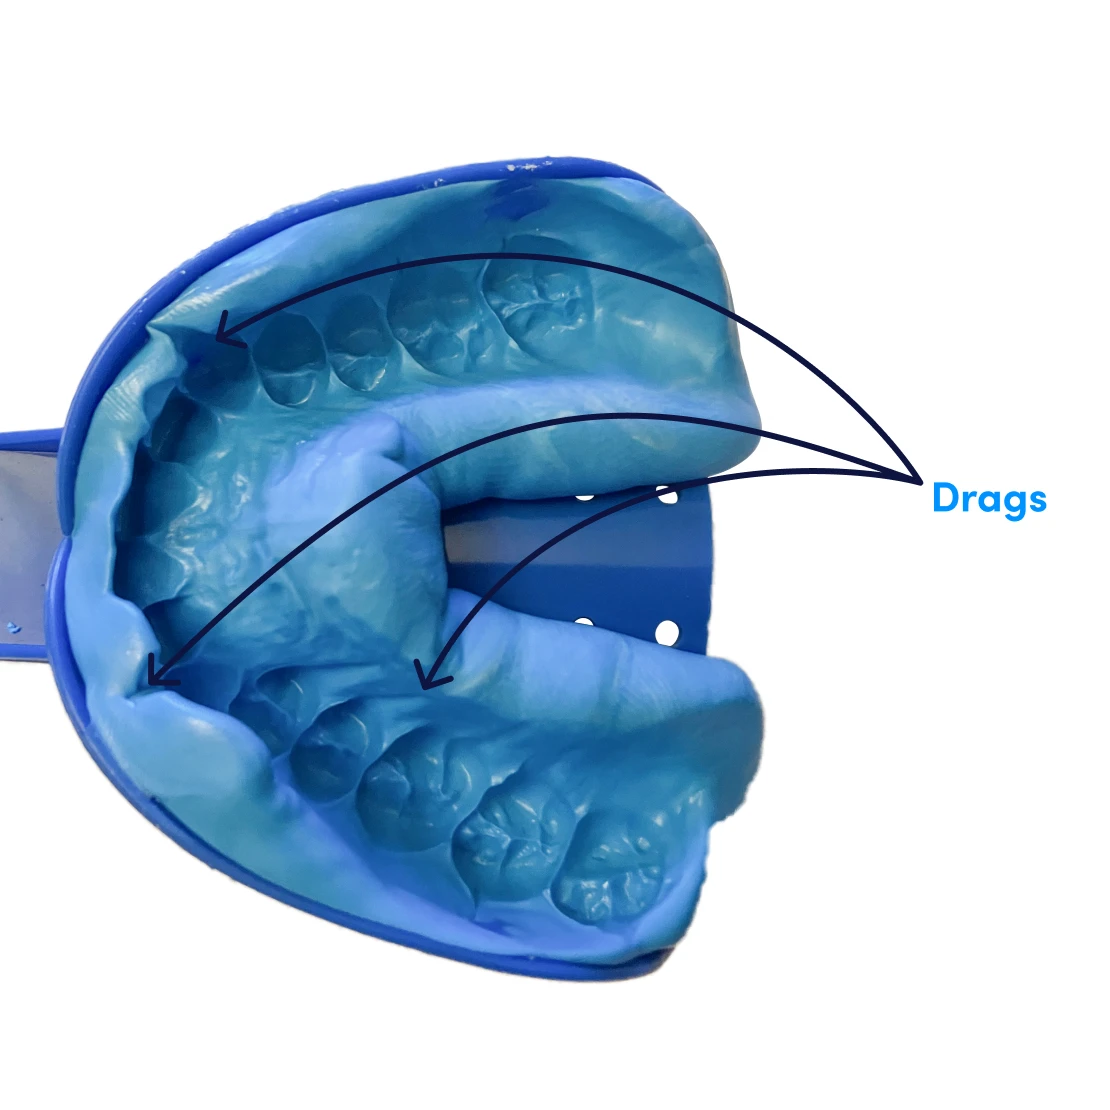
Bad impression #1
Presence of drag marks.
To avoid these, wait until the material is fully set before removal and extract it straight down for upper impressions and straight up for lower ones.
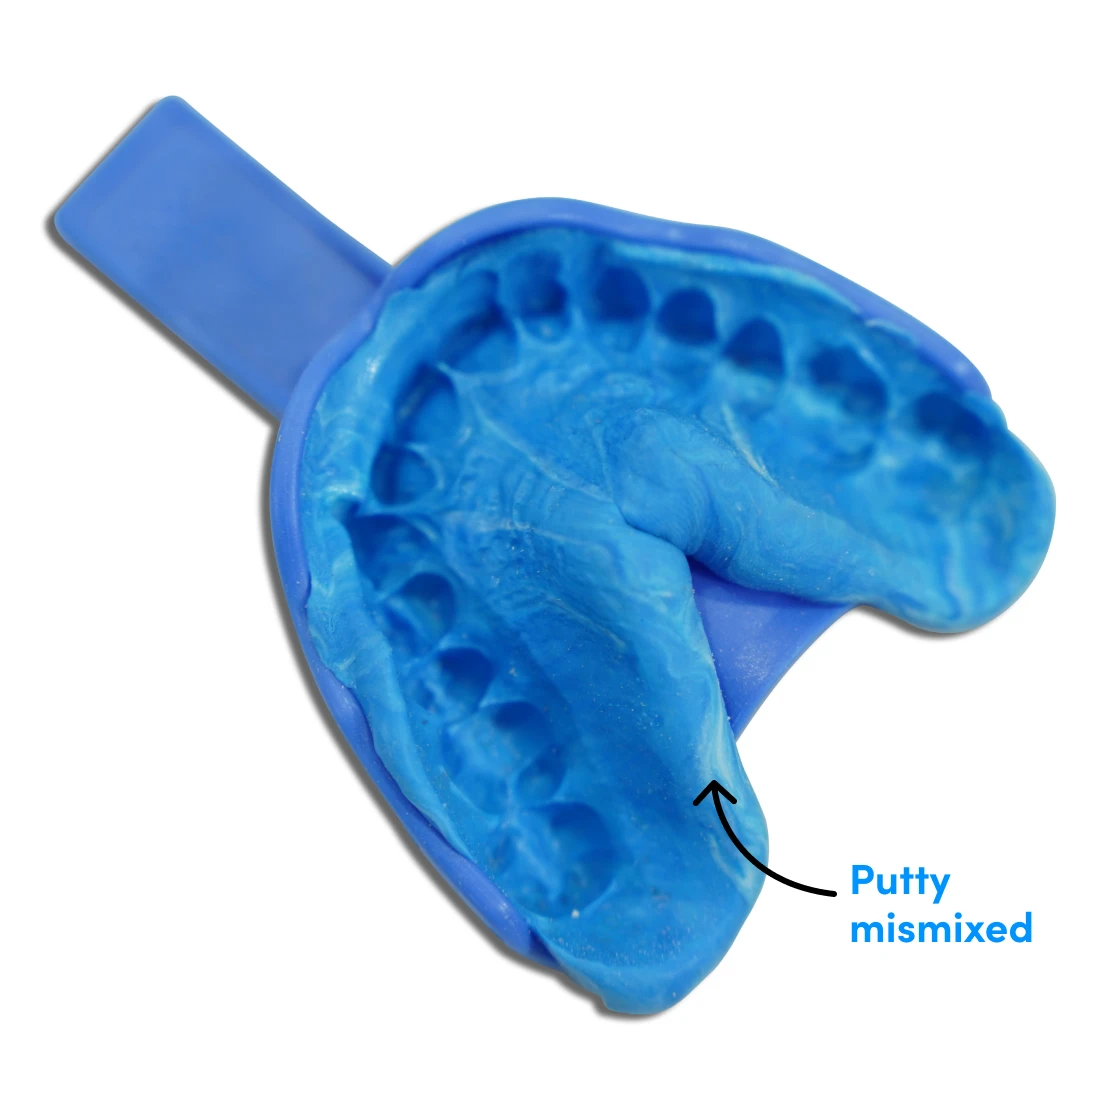
Bad impression #2
Improperly mixed material.
Blend the putties until a uniform color is achieved, without any streaks. Perform this step right before placing the material in the trays.
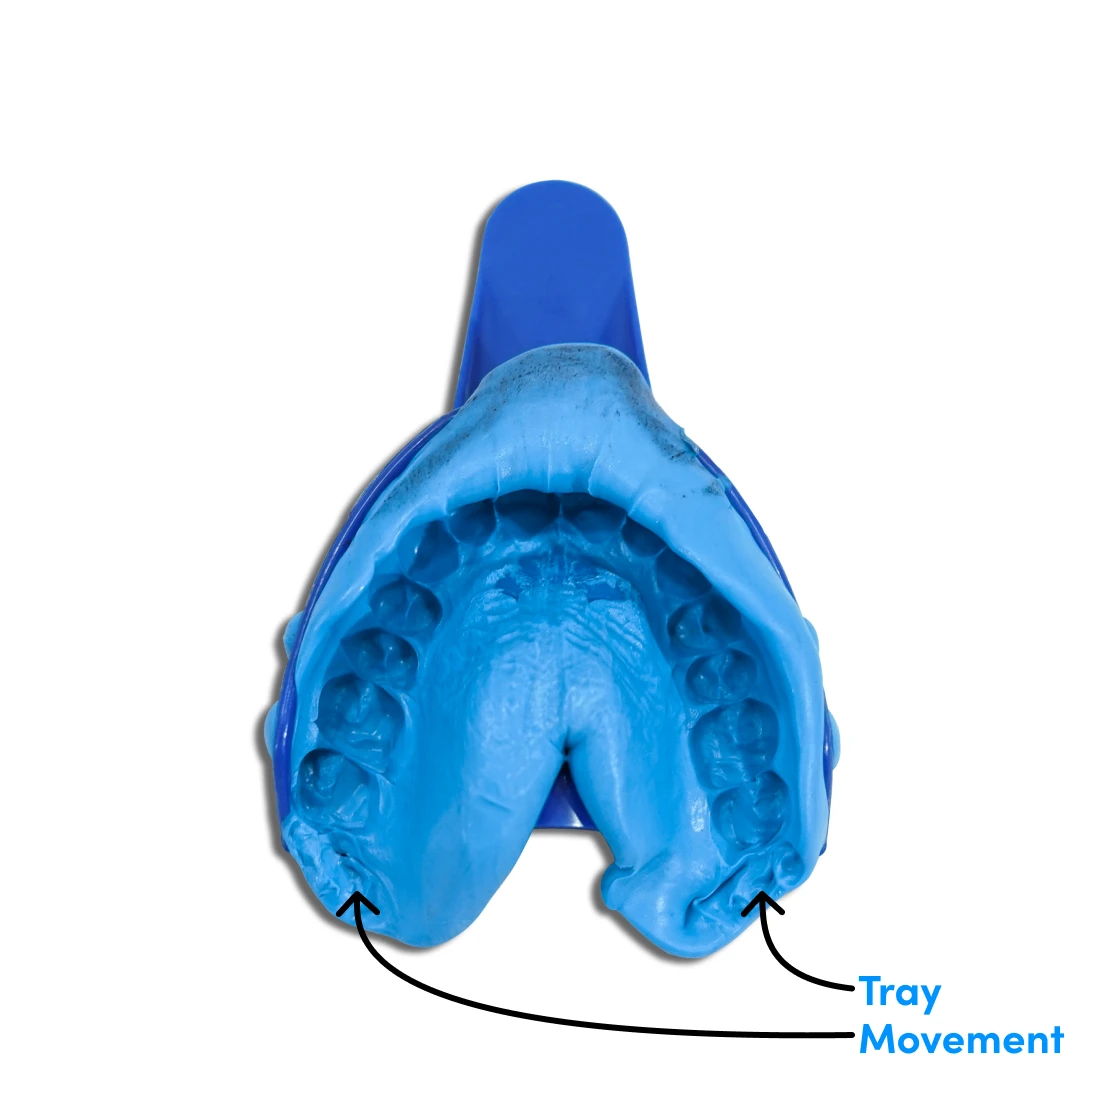
Bad impression #3
Movement of teeth during the process.
If the tray shifts, it can distort the impression. Securely hold the tray to prevent movement for a reliable impression.
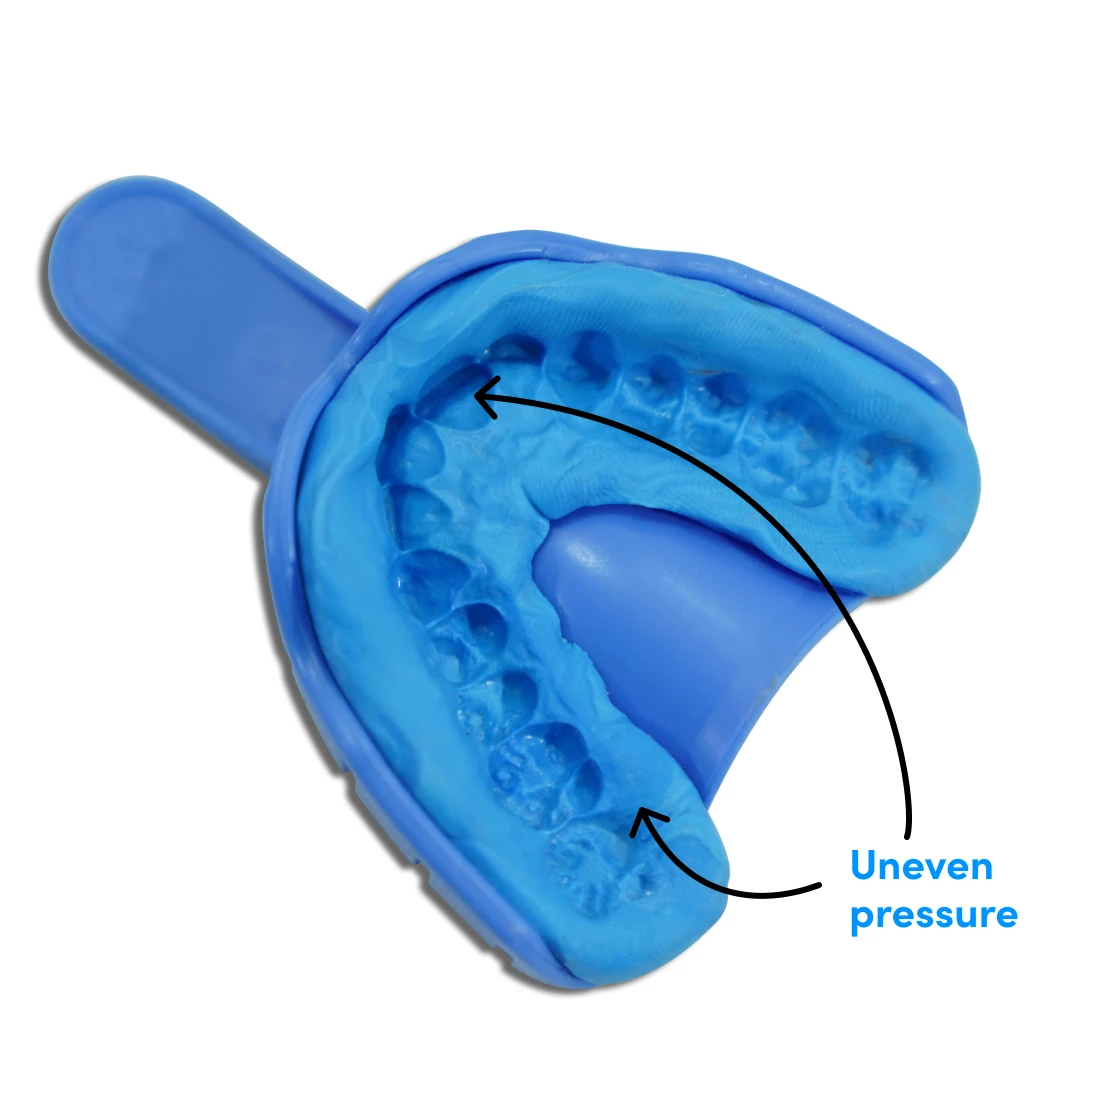
Bad impression #4
Inconsistent pressure.
When applying the material, use your fingertips to evenly distribute it across your dental arch, ensuring it covers both gums and molars. Check for complete coverage front and back.


FAQs
Here are some of the most frequently asked questions:
How to ship back my dental impressions?
A pre-paid return envelope is included. Don't discard it. After completing your impressions, place them in the envelope and mail them back.
How long does it take to get my treatment plan?
Expect 4–6 weeks. Send your impressions quickly, complete your account information, and submit your photos to expedite the process.
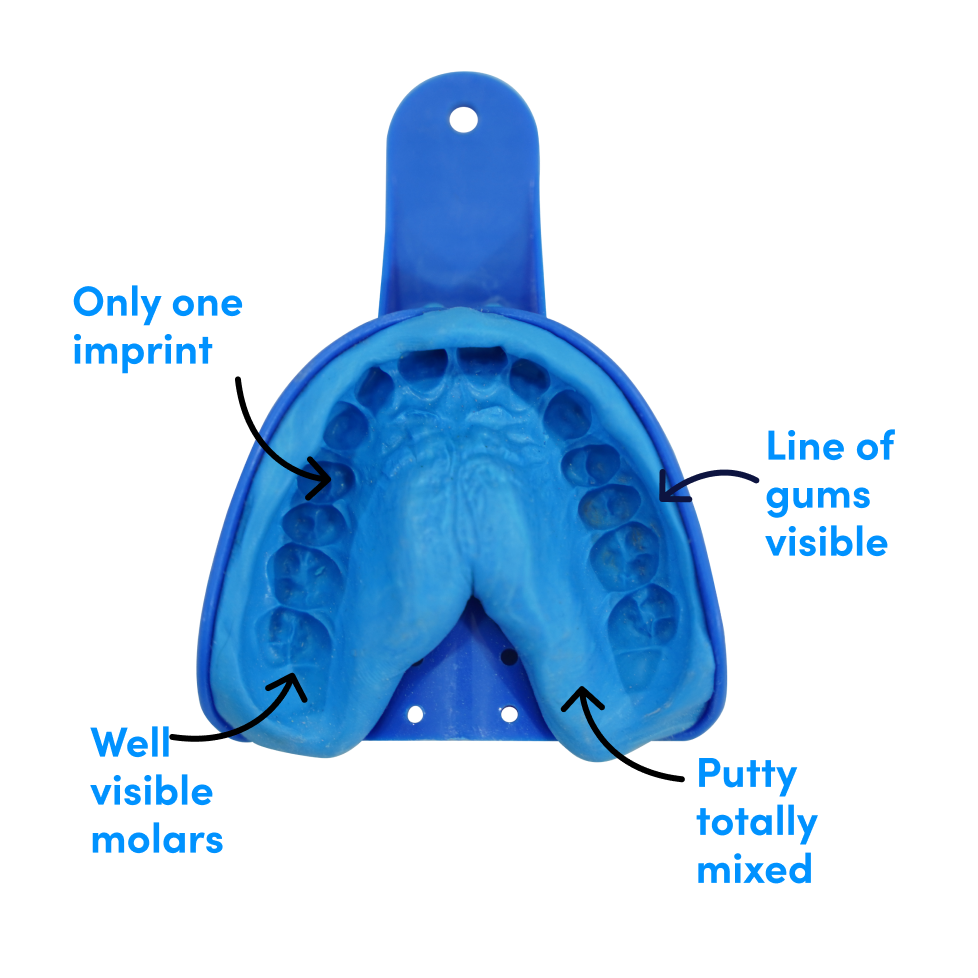
How do I know if my impressions are correct?
We need one accurate impression of each arch. The kit includes extra putties. Send back your impressions for evaluation. If necessary, we'll provide a replacement kit.
Need more help?


