
Key takeaways
Clear braces are put on by bonding clear or tooth-colored ceramic brackets to each tooth, threading an archwire through the brackets, and securing it with clear elastic ties. The process starts with a thorough cleaning of the teeth, and each bracket is precisely positioned to ensure proper movement. The total placement usually takes about one to two hours.
Step 2: Bracket placement
Each bracket is carefully placed on the tooth surface according to your treatment plan.
The precise placement ensures the brackets are in the correct position to apply the necessary pressure.
Step 1: Preparation
Your orthodontist will clean and prepare the surface of each tooth to ensure the adhesive bonds correctly.
Dental cement is applied to the back of each ceramic bracket.
A metal band may be placed around your back molars for anchoring.
Step 3: Archwire attachment
A thin metal archwire is threaded through the brackets.
This wire connects all the brackets and is the component that applies the force to move the teeth.
Step 4: Securing the wire
Clear or tooth-colored elastic ties are used to secure the archwire to the brackets.
Some braces may use self-ligating brackets that don't require elastic ties.
What happens next
After the braces are on, you may experience some soreness that should go away within a few days.
It is important to avoid hard, crunchy, or sticky foods that could damage the brackets.
You will need to visit your orthodontist for regular adjustments to tighten the wire and guide your teeth into their final positions.
Table of Content
Pre-braces checklist
Before braces fitting, dental cleaning should be the first thing on your checklist to remove any plaque and tartar buildup. Your dentist will polish your teeth and make sure there are no underlying issues like cavities or gum inflammation. In the weeks leading up to your appointment, maintaining good brushing and flossing habits helps keep your teeth and gums healthy and ready for the bonding process.
Image Caption: Dental cleaning Alt Text: A patient getting a dental cleaningStep 1 - Brackets placement
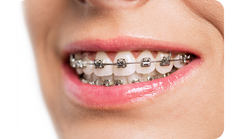
So, how do they put clear braces on? The process is nearly identical to that of traditional metal braces; the only difference is that the brackets are made from clear ceramic or porcelain, giving a more subtle and natural look.
Step 2 - Inserting the archwire
Many people think that's all there is to it when learning how braces are put on, but there's a bit more happening behind the scenes. Brackets need extra stability and support, which they get from the archwire threaded through the brackets and is secured in place by small elastic bands.
Step 3 - Securing the wire
Depending on your orthodontic choice, your dentist may add self-ligating clips instead of using elastic bands with traditional brackets. This allows for smoother movement but can be a bit pricey.
Step 4 — Final adjustments
The final adjustments are about making the patient comfortable and ensuring everything is in place. The dentist will also provide detailed aftercare instructions and schedule the next adjustment appointment.
These steps can vary according to the severity of malocclusion and the type of braces. However, if you have a mild to moderate case and want to stay away from braces pain, then putting aligners on your teeth might be a better option.
Skip the brackets, but transform the smile
Caspersmile clear aligners are gentle, clear, and wire-free.

What to expect during the appointment?
Before worrying about how long do braces take to work, let's discuss what exactly you could expect from the appointment to put on the braces. A mild tenderness is normal within the first 60-90 minutes of the process. However, the placement process is supposed to be pain-free, followed by a little discomfort, which will also subside in a few days.
Tips for the first week after getting clear braces
For the first week, avoid eating foods that are hard or crunchy in texture. To control the pain, take over-the-counter pain relievers, rinse your mouth with warm saltwater, and apply a cold compress to soothe the soreness.
Here is what you can do in the first week after braces to allow for a smooth transition into the treatment.
Diet and pain management

Be careful with your food choices. In the first week, go for soft foods, like mashed potatoes, smoothies, or yoghurts. Use pain relievers with your dentist's advice and promote healing with warm water. Simply mix a half teaspoon of salt into eight ounces of warm water and swish a few times a day. To speed up the healing process, use a cold compress to reduce the soreness and inflammation.
Oral hygiene care
Follow a consistent oral hygiene routine by brushing, flossing, and staying hydrated to ensure your mouth remains clean and free of food debris. Use an orthodontic wax to minimize the irritation caused by the wire.
Stay Consistent
Be consistent with your routine and check-ups. Patience is the key here; don't rush to get rid of the discomfort. Instead, fall in love with the process.
After the first week with all these tips, you will have a strong foundation, after which things will get easier. One more thing: even if you feel like you're healing well, always keep your dentist in the loop.
How long the braces stay on
The total time can range from twelve months (mild cases) to three years (severe cases). Treatment duration will depend on the case complexity and patient compliance. Mild cases can be fixed within 12 to 18 months; complex issues will take longer. Let's walk through all the factors that can influence the length of your orthodontic treatment and what you can do to help achieve the best results in the shortest time.
Complexity of the case
Minor crowding or spacing can take as little as 12 to 18 months; however, severe bite issues can take up to 24 to 36 months or maybe more.
Age
Teens often take less time than adults because their jaws are developing. But there isn't any hard and fast rule.
Patient compliance
One of the biggest factors that can affect how long your treatment takes is how well you follow your orthodontist's instructions. Skipping appointments, not wearing elastics, ignoring food restrictions, or slacking on oral hygiene can all add months to your timeline. Stay consistent, follow the advice, and you'll reach your perfect smile much faster.
Final thoughts
Clear braces for teens & adults offer an effective, discreet way to achieve a straighter, more confident smile. While treatment duration can vary, staying consistent and following your orthodontist's guidance can make the journey faster and easier. The process of getting clear braces can be quick, painless, and precise, so don't worry, you'll walk out of your appointment ready to start your smile transformation.
Frequently asked questions


References
Higuera, V. (2019b, September 19). Foods you can and shouldn't eat if you have braces. Healthline. https://www.healthline.com/health/what-can-you-eat-with-braces
Mfa, R. J. S. (2019, February 8). How are braces put on? Healthline. https://www.healthline.com/health/dental-and-oral-health/how-are-braces-put-on
Share This Article


Subscribe our newsletter
By clicking subscribe, you agree to our Privacy Policy and opt in to receive communications from Caspersmile. You can unsubscribe at any time.


